
If you have been wondering how to start/stop Oracle Analytics Cloud and/or Essbase 19c on OCI via command line, see below for the details. Admin access will be needed to complete these steps.
- Install curl
- Install Oracle Cloud Infrastructure (OCI) Command Line Interface (CLI)
- Create the config file for OCI CLI
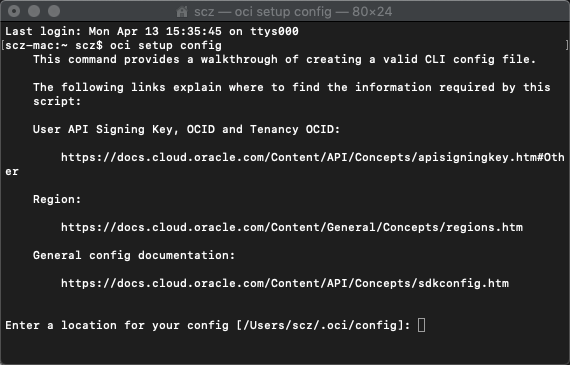
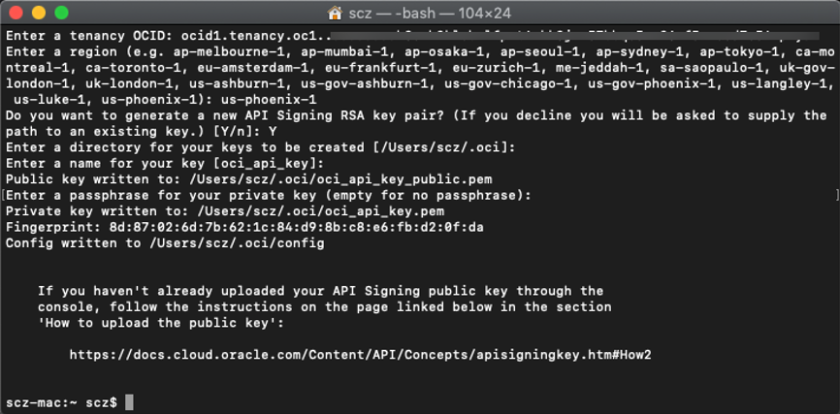
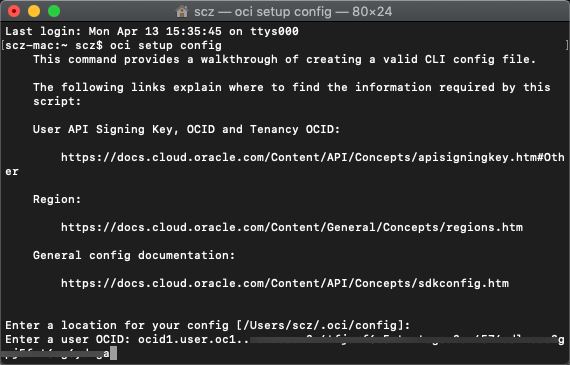
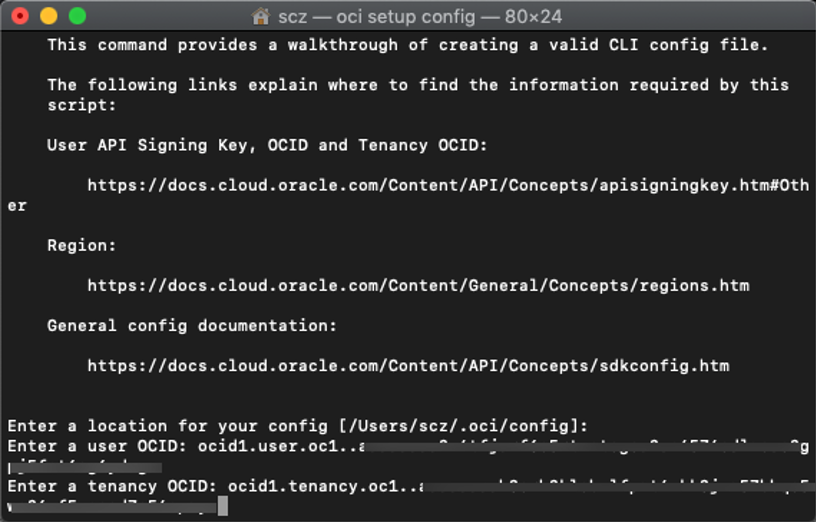
- From the command line, run: oci setup config
- You will be asked to enter a location for your config. Choose the default (hit Enter).
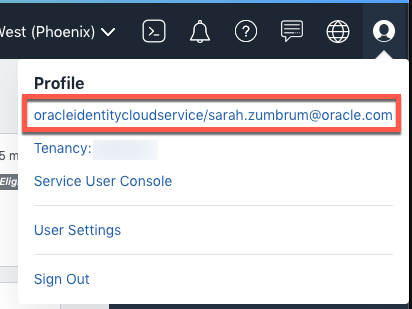
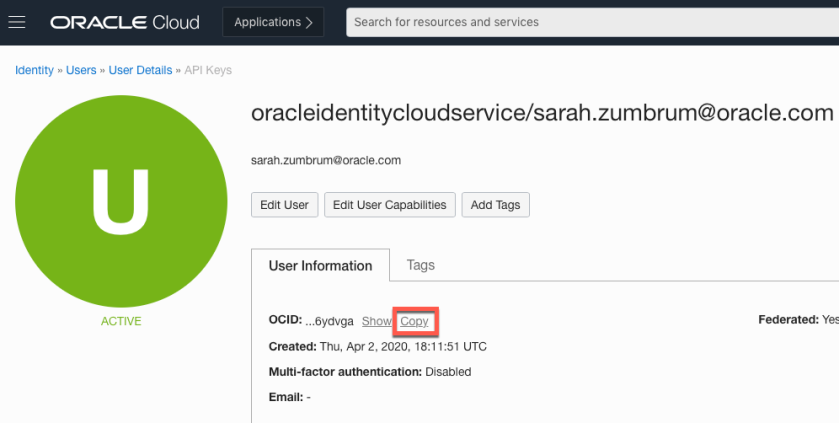
- You will be asked to enter your user OCID. This can be found by clicking on the “man” in the upper right-hand corner and choosing your login ID.
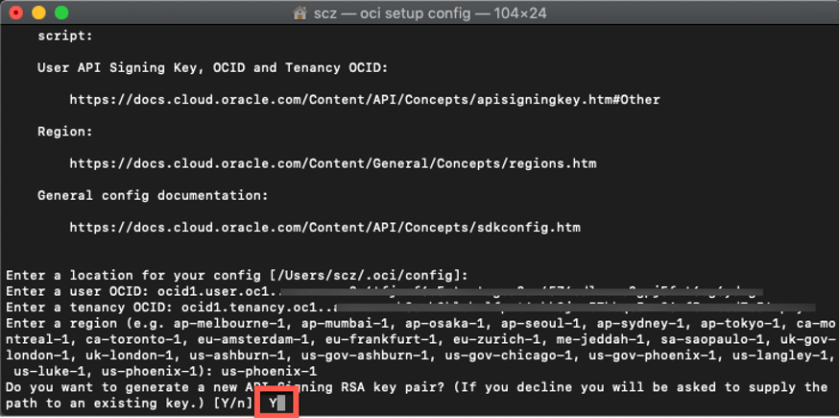
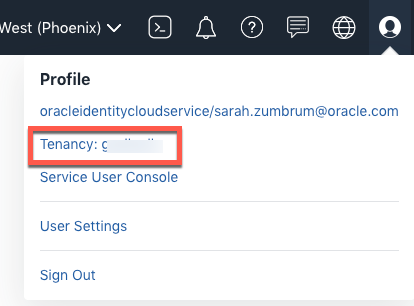
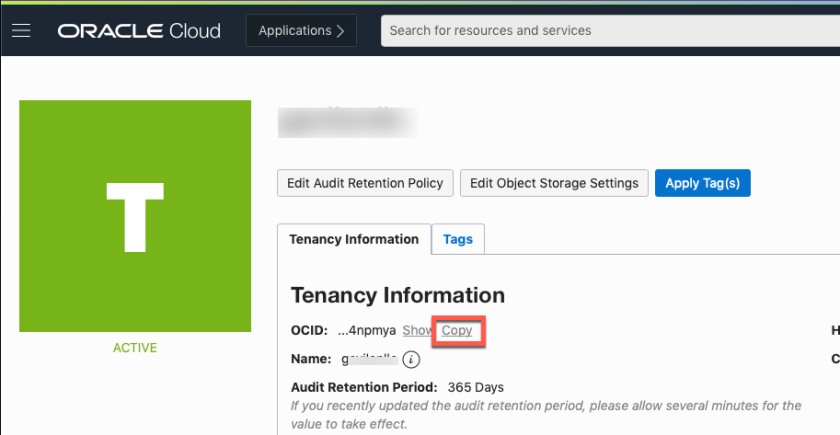
- Next, you will be asked to enter your Tenancy OCID. This can be found following the same process as above, except chose the tenancy name.
- Next you will be asked to enter your region. You can find this at the top of your OCI homepage.
- You will be asked if you want to generate a new API Signing RSA key pair. If you already have one, you can re-use it. To create a new one, enter “Y”.
- Hit Enter to choose the default directory for the keys to be created.
- Give your key a name (or hit Enter to use the default).
- Choose a passphrase for your key, if desired.
- (Note: I chose all defaults for my new key). You will have a new key created in the .oci folder.
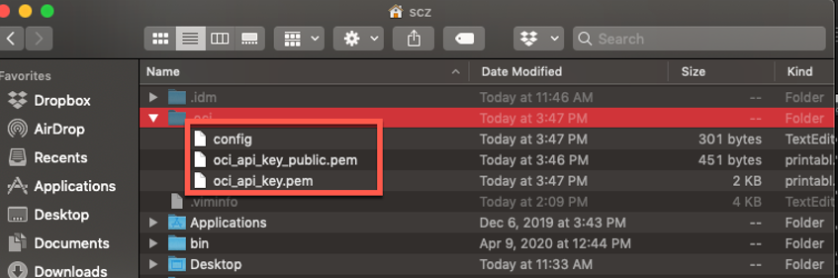
- Now we have our .oci folder config files:
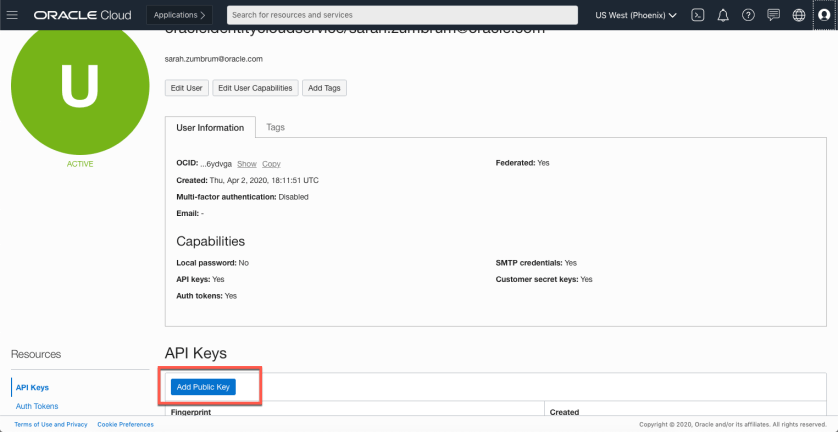
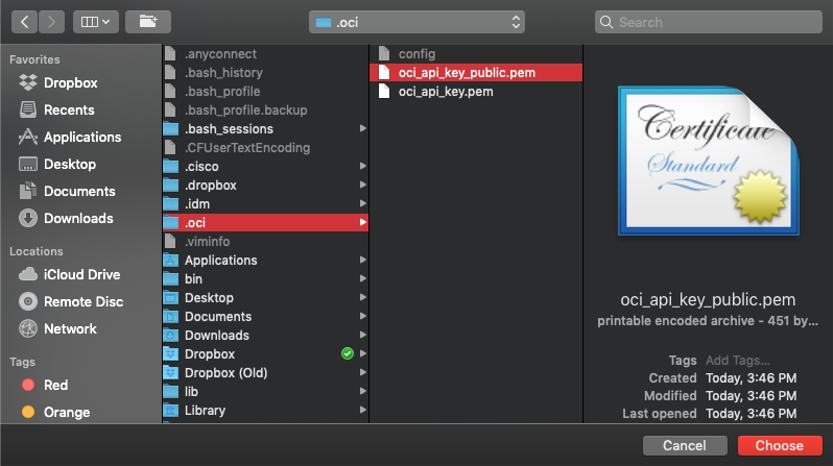
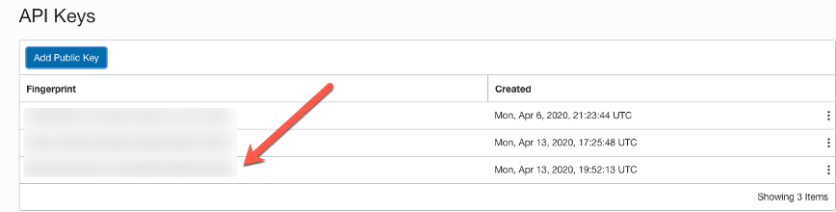
- We now need to load our oci_api_key_public.pem to our IDCS user profile under “API Keys”. Go back to the same palce where you got your user OCID.Under the section called “API Keys”, click “Add Public Key” and add the oci_api_key_public.pem file to upload your new “fingerprint”.
Note! The .oci file may be hidden for you. Unhide all files to see the new OCI files created.
- You will be asked to enter a location for your config. Choose the default (hit Enter).
- From the command line, run: oci setup config


- To stop the Essbase stack services, you will only need to stop the compute and database instances. You will need the OCIDs for these 3 pieces (Essbase compute, Bastion compute (which is an optional component), and database). To get the Essbase and Bastion compute OCIDs, the easiest way to do this is, from the left-hand hamburger, choose
Resource Manager >> Stacks >> Stack Details >> Job Details for the Essbase stack you are setting up for automation.
Under “Resources” on the left-hand side there is an option called “Outputs”. The 2 compute OCIDs will be listed here for copying.Copy these to a text editor.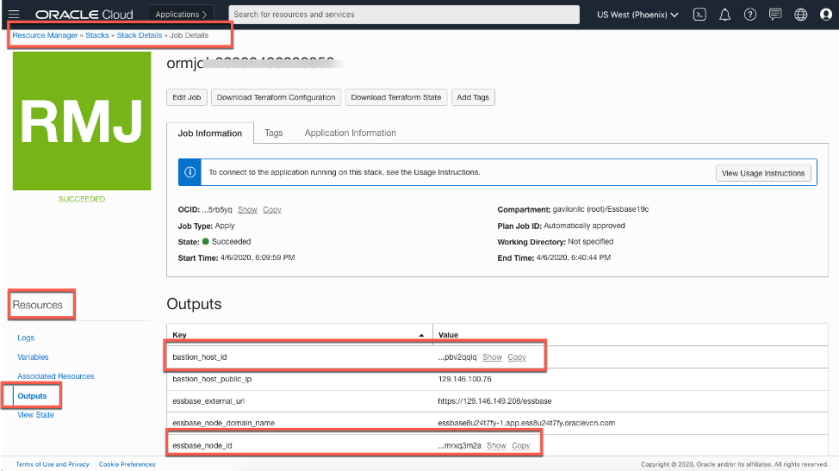
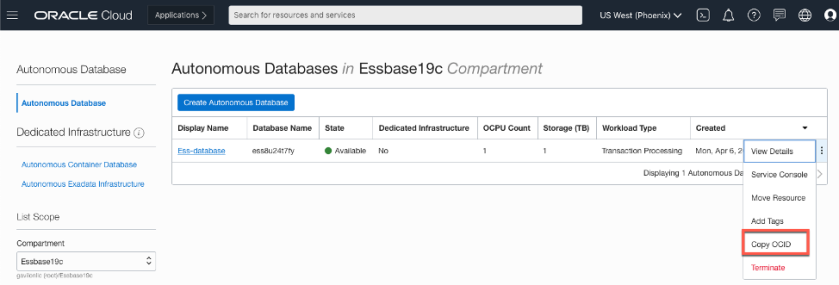
- To find the database OCID, find the correct drawer from the left-side hamburger. Since my database is an Autonomous Transaction Processing database, I chose that option. For the Essbase database, click the right hamburger and choose “Copy OCID” to your text editor.
Start a new text editor and create the OCI commands. You will need to stop the compute instances before stopping the database instances.

Actual code (with OCID shortened to 4 characters for security):
oci compute instance action –instance-id ocid1.instance.oc1.phx.anyh –action SOFTSTOP –wait-for-state STOPPED
oci compute instance action –instance-id ocid1.instance.oc1.phx.anyh –action SOFTSTOP –wait-for-state STOPPED
oci db autonomous-database stop –autonomous-database-id ocid1.autonomousdatabase.oc1.phx.abyh –wait-for-state STOPPED
- Save the file as a .sh or .bat to be run.
To start the instances back up, run the database first, then the 2 computes:

Actual OCI code (with OCID reduced to 4 characters for security):
oci db autonomous-database start –autonomous-database-id ocid1.autonomousdatabase.oc1.phx.abyh –wait-for-state AVAILABLE
oci compute instance action –instance-id ocid1.instance.oc1.phx.anyh –action START –wait-for-state RUNNING
oci compute instance action –instance-id ocid1.instance.oc1.phx.anyh –action START –wait-for-state RUNNING
At this point, you can put it into a task scheduler of your choice. I use crontab because I have a Mac and I’ve set it to turn on at 9AM on weekdays and shutdown at 7PM on weekdays:

Actual crontab lines:
0 19 * * 1-5 cd /Users/scz/Dropbox && ./startGavilonEssbase.sh >> /Users/scz/Dropbox/crontaboutput/startG___Essbase_$(date +\%Y\%m\%d\%H\%M\%S).txt
0 9 * * * 1-5 cd /Users/scz/Dropbox && ./stopGavilonEssbase.sh >> /Users/scz/Dropbox/crontaboutput/stopG___Essbase_$(date +\%Y\%m\%d\%H\%M\%S).txt
- Now to automate starting and pausing OAC (you can’t fully stop OAC, but you can pause it at 15% of the running cost).For OAC automation, you will need your IDCS OCID and PSM ID.
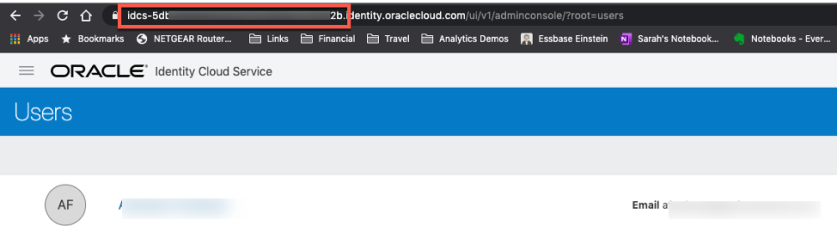
- You can find your IDCS OCID by going to the Identity Console. It will be in the URL. Choose “idcs-xxxxxxxx”. You do not need the “.identity.oraclecloud.com”.Copy this to a text editor.
- You can find the PSM ID from the Identity Cloud Service console, as well. On the left-hand hamburger, choose Applications. In the search bar, enter “psm”.
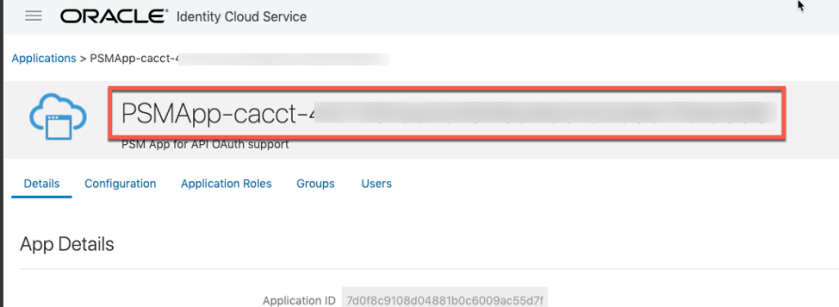
Open the PSMApp…. Option.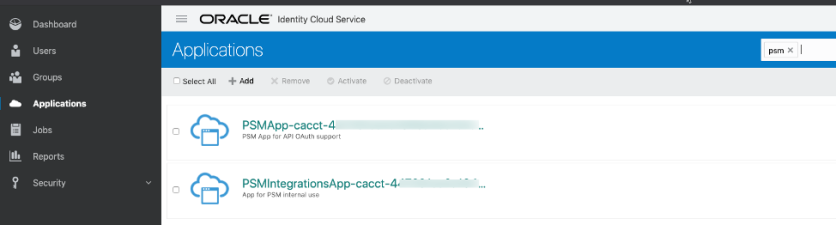
- Copy the entire PSM… line and paste to a text editor. REMOVE the “App” from “PSMApp”!
Now you are ready to start building your curl call. Be sure to enter this code all on one line as it may fail otherwise. I have broken this up for educational purposes.

The code is below:
curl -v -i -X POST -u username@oracle.com:Pa55w0rd -H “Content-Type:application/vnd.com.oracle.oracloud.provisioning.Service+json”
-H “X-ID-TENANT-NAME:idcs-5db___”
- To stop the OAC services, simply change the previous script to “/stop” instead of “/start”.
- Save these scripts as .sh or .bat then run from a task scheduler and you are set for instance startup/stop automatically.
PS – Special thanks to KarenZ for the help on Essbase!

2 comments